Introduction
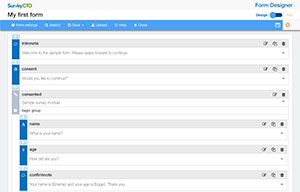
SurveyCTO helps you to collect data using electronic forms. These forms can be surveys, registration forms, inspection checklists, or anything else you might imagine. The definitions for these forms – the specifications that define how they should look and how they should function – are contained in spreadsheets that you can directly edit in Microsoft Excel or Google Sheets. Rather than editing form definitions directly, however, you can use SurveyCTO's online drag-and-drop form designer to more easily create and edit your forms.
If you learn best by doing, you can jump right in with our quick-start guide or even go it alone by just starting a new form on the Design tab. To learn more first, read on...
Online form design vs. editing spreadsheets directly
There are two ways to edit your form definitions in SurveyCTO: online using our drag-and-drop form designer, or directly using Microsoft Excel or Google Sheets. There are deep parallels between the two methods – so, for example, the language used to label things in the online designer matches the field and column names used in the spreadsheet definition – so that you can go back and forth, using whichever editing method is best for your current needs.
If you're new to SurveyCTO, you probably want to use the online designer since it's just an easier, friendlier format. But if you're on a plane, in a very remote area, or otherwise without Internet access, then directly editing a spreadsheet form definition is the way to go. Spreadsheets are also great for large-scale copying-and-pasting, collaborating with others (even in real-time if you're using Google Sheets!), tracking changes, or just saving form definitions for the historical record.
When you start a new form in the Design tab's Your forms and datasets section, "Edit online" is the easiest way to start editing your new form – but there are also "Advanced download options" that allow you to download the new form's definition to your local computer or Google Drive. And even if you select "Edit online", you can always click Export in the upper-right to export and begin editing the spreadsheet form definition. Likewise, for existing forms on your server, there is a simple "Edit" option to edit online, plus a "Download" option to download the form definition. There are also options to "Upload" new or updated form definitions, again using the spreadsheets directly.
Much of the documentation here – in particular, the reference materials for all of the functions and field types available to you – is written from the perspective of the spreadsheet form definition. So, for example, each field type will be described in terms of the attributes that can be specified in the various columns of the form definition. All of the same attributes are available in the online designer, using largely the same language – but it's all organized in a friendlier way. We have chosen not to separate this documentation for designer vs. spreadsheet users, in part because we expect that many users will eventually want to switch back and forth between the methods of form design. But to help highlight information specific to those using the online form designer, some help content will appear in green.
Form definitions: an introduction
Your form's definition, in spreadsheet form, is a workbook with three worksheets:
-
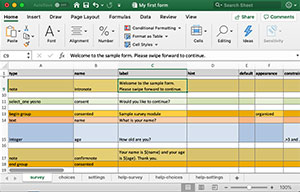
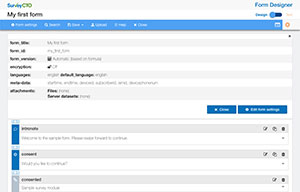
The survey sheet, which specifies details about the data collected by your form (i.e., about the fields or questions in your form). In the online designer, the main window shows most fields and groups in this survey sheet (all except for standard meta-data fields, which are enabled or disabled in Form settings).
-
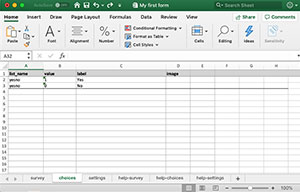
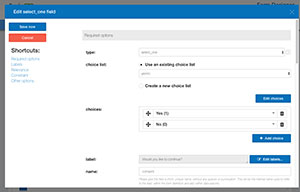
The choices sheet, which lists all of the option labels and internal values for multiple-choice questions. On this worksheet, the list_name column specifies the name of a multiple-choice question type (without any spaces or punctuation, like "yesno"), the value column specifies the internal value stored for a given choice, and the label column specifies the label used for that choice in the form's user interface. In the online designer, a choice list is editable in-place, whenever you edit a multiple-choice question that uses it.
list_name value label image yesno 1 Yes yesno 0 No If you want to include an image for the choice label, you can specify an image filename (e.g., "yes.png") in the image column; if you do so, then you must always upload that image file as one of the attached media files when you upload the form to your SurveyCTO server. In the online designer, you simply attach images directly and they are automatically uploaded to the server, as part of your form definition.
If you want to filter the list of choices shown to users based upon prior selections (e.g., to only show cities within the state already selected by the user), see Dynamically filtering lists of multiple-choice options.
See help on the select_one and select_multiple field types for more on multiple-choice questions.
-
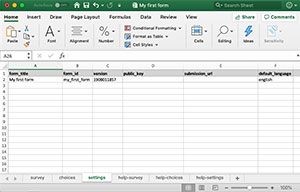
The settings sheet, which includes columns to hold the form title, form ID, and other form-wide settings. All settings should be recorded into row 2 of this worksheet, and the form ID must be unique to the form (and not include any spaces or punctuation). Individual settings are documented elsewhere, with their relevant features. In the online designer, all form settings are available under Form settings.
You enter each question or field row-by-row into the survey sheet, in the sequence in which you want them to appear in your form. For each, the type column specifies the field or question type, and the name column specifies the internal name for that field. These field names must be unique, and they cannot include any spaces or punctuation. They are the variable names that will appear in your form's exported data.
For those field types that present a user interface, the label column is where you put the primary text for the question or field. Normally, your label is just plain text, but you can include HTML formatting if you wish to bold some text, use different colors, etc. – and the form designer includes a simple WYSIWYG HTML editor to make formatting easy. You can also enter line-breaks if needed; when using Excel to edit your form definition, you can insert line-breaks into a label by pressing Alt+Enter on Windows or Control+Option+Enter on a Mac (in the form designer, you just press Enter).
You can also refer to the data entered into or calculated by previous fields by including ${fieldname} in your text, where "fieldname" is the name of the previous field. If you refer to a visible field (as opposed to a calculated one), then SurveyCTO Collect will hyperlink the field's value so that users can easily jump back to change it (if hyperlinking is enabled in Collect's General Settings).
If you refer to a group of fields with ${groupname}, then the label of the group will be displayed – and, if hyperlinking field references is enabled, that label will be hyperlinked to the start of the group. If the referenced group is a repeat group, then labels will be displayed for all instances in the repeat group. See the Grouping and repeating questions help topic for more on grouping or repeating your fields.
The rest of the help topics in this and the other Designing forms sections cover everything else you need to know about designing forms in SurveyCTO. If you learn best by example, you can browse our sample forms.
